
General Actions:


Last modified on January 26, 2015 11:44
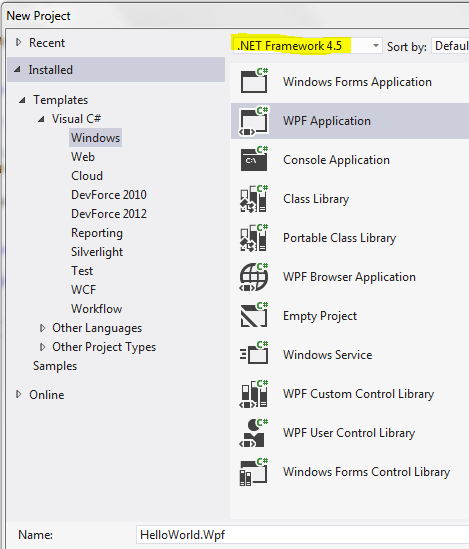
- Start by creating a blank WPF project. Go to "File|New|Project..." and name the project HelloWorld.Wpf.
- Delete MainWindow.xaml. We won't need it.
- Install the Punch NuGet package. Go to "Tools|Library Package Manager|Package Manager Console", enter and run the following command.
PowerShell Install-Package IdeaBlade.Cocktail -ProjectName HelloWorld.Wpf - Install the DevForce 2012 Server NuGet package. We won't need this quite yet, but it's good practice to add it now. From the Package Manager Console, enter and run the following command.
PowerShell Install-Package IdeaBlade.DevForce.Server -ProjectName HelloWorld.Wpf - Create a ViewModel. Add a new class to your project, name it MainViewModel and replace the contents of the file with the following. Learn more about ViewModels here.
C# using System.ComponentModel.Composition;
using System.Threading.Tasks;
using Cocktail;
namespace HelloWorld.Wpf
{
[Export]
public class MainViewModel
{
private readonly IDialogManager _dialogManager;
[ImportingConstructor]
public MainViewModel(IDialogManager dialogManager)
{
_dialogManager = dialogManager;
}
public async Task SayHello()
{
await _dialogManager.ShowMessageAsync("Hello World!", DialogButtons.Ok);
}
}
} - Create a View. Right-click on the project, select "Add|New Item..." and then Window (WPF). Name it MainView.xaml.

- Replace the contents of the file with the following.
XAML <Window x:Class="HelloWorld.Wpf.MainView"
xmlns="http://schemas.microsoft.com/winfx/2006/xaml/presentation"
xmlns:x="http://schemas.microsoft.com/winfx/2006/xaml"
xmlns:mc="http://schemas.openxmlformats.org/markup-compatibility/2006"
xmlns:d="http://schemas.microsoft.com/expression/blend/2008"
mc:Ignorable="d"
d:DesignHeight="300" d:DesignWidth="300">
<Grid>
<Button Content="Say Hello" x:Name="SayHello" />
</Grid>
</Window> - Create a bootstrapper. Add a new class to your project, name it AppBootstrapper and replace the contents of the file with the following. Learn more about bootstrapping here.
C# using Cocktail;
namespace HelloWorld.Wpf
{
public class AppBootstrapper : CocktailMefBootstrapper<MainViewModel>
{
}
} - Open App.xaml and replace the contents of the file with the following.
XAML <Application x:Class="HelloWorld.Wpf.App"
xmlns="http://schemas.microsoft.com/winfx/2006/xaml/presentation"
xmlns:x="http://schemas.microsoft.com/winfx/2006/xaml"
xmlns:local="clr-namespace:HelloWorld.Wpf">
<Application.Resources>
<ResourceDictionary>
<ResourceDictionary.MergedDictionaries>
<ResourceDictionary>
<local:AppBootstrapper x:Key="bootstrapper" />
</ResourceDictionary>
</ResourceDictionary.MergedDictionaries>
</ResourceDictionary>
</Application.Resources>
</Application> - Build and run. Congratulations, you just created your first application with Punch.
- Next steps, learn about adding a Model, the EntityManager, EntityManagerProvider and the Unit of Work Pattern or proceed with our Happy Hour Tutorial and the TempHire reference application.